Lesson 74
Translation made by MARION


This lesson was created in PSP 18, but it can also be made in other versions.
The colors can vary greatly depending on the PSP you are using
Please treat the tubsters' work with respect.
Thanks
Mieke
Supplies Here
Plugins Here
The filters marked * can be imported into the Unlimited 2.0 filter.
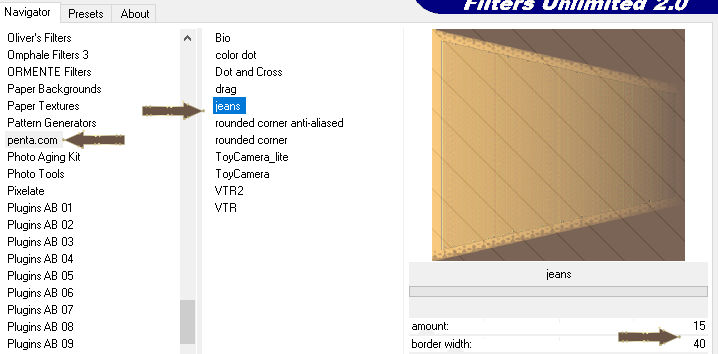
Filter Penta com---Jeans*
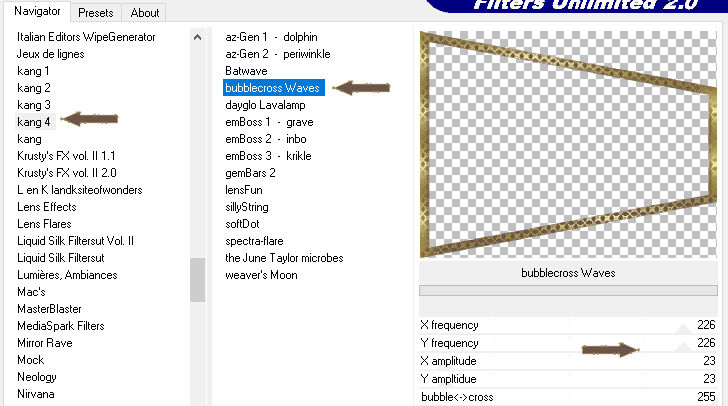
Filter Kang 4---bubblecross Wavers *
Aliën Skin Eye Candy 5---Impact---Gradient Glow.
Put the Gold pattern---in your pattern folder of PSP
Tubes in folder of your choice.
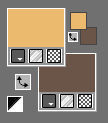
Set your Background color to color #ebbb6f---Set your Foreground color to color #6b5548
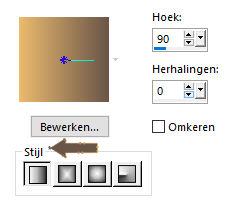
Gradient ---Style linear---90---0.
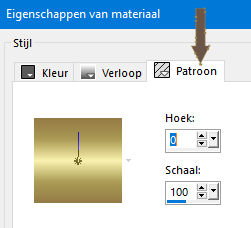
Material Properties--- Pattern checked
Set your Pattern to --(gold Pattern ) with these settings---0---100.
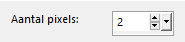
1.
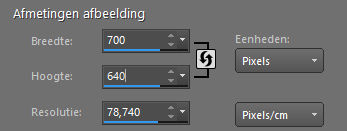
File---Open a new transparent image in this size: 760 x 640 pixels
2.
Layers---New raster layer---Flood fill the layer with the gradient
3.
Effects---Geometric Effects---Perspective Horizontal
Distortion 50---Color checked---Color #ebbb6f

4.
Activate your Magic Wand - Tolerance at 0 and Feather at 0 .

5
Select with the wand the top and bottom boxes
Delete on your keyboard
Selections ---Select none
6.
Effects---Plugins---Filter in Unlimited 2.0---PentaCom---Jeans with these settings:---15---40.
And Apply.
7.
Activate your Magic Wand - Tolerance at 0 and Feather at 0
Again ---Select with the wand the top and bottom boxes
Selections---Invert
8
Layers---New raster layer
Flood fill the selection the gold pattern
9.
Selections---Modify---Contract 25

10.
Press Delete on your keyboard
11.
Selections---Invert
12.
Effects---Plugins---Filter in Unlimited 2.0---Kang 4---bubblecross Waves---
225---226---23---23---255. using the default settings and Apply
Effects---Edge Effects---Enhance More
Selections---Invert
13.
Selections---Modify---Contract 25
Flood fill the selection the gold pattern
14.
Selections---Modify---Contract 5
Flood fill the selection with the gradient
Press your Delete key once
15.
Selections---Modify---Contract 25
Flood fill the selection the gold pattern
16.
Selections---Modify---Contract 2
Press your Delete key once
17.
Selections---Select none
Layers---Merge---Merge Down
18
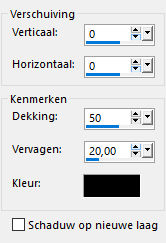
Effects---3D-Effects---
Drop Shadow—0---0---50---20 Color black
19.
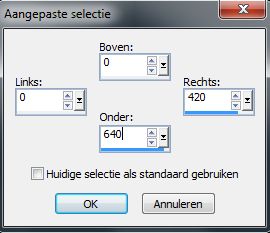
Activate Selection Tool-Custom Selection(S)-Rectangle with these settings :
:
Top 0---Left 0---Right 420---Bottom 640.
20.
Selections---Invert---Press Delete on your keyboard
Selections---Select none
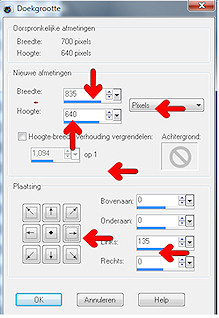
21.
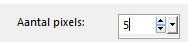
Image ---Canvas Size ---835---640---pixels.
Click on the little arrow in the middle on the right--on the left side is 135
as shown in the example below
 e
e
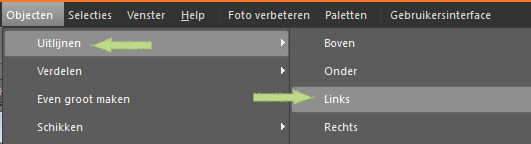
22.
Objects---Align---Left
23.
Layers---Duplicate
Image - Mirror - Mirror Horizontal
(Image - Mirror in older versions of PSP)
Layers---Merge----Merge Down
24
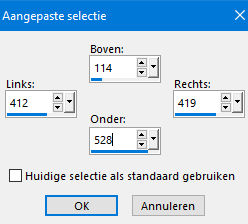
Activate Selection Tool---Custom Selection(S)---Rectangle with these settings:  .
.
Top 114---Left 412---Right 419---Bottom 528.
25.
Layers---New raster layer.
Flood fill the selection the gold pattern
Selections---Select none
26.
Effects---3D-Effects---
Drop Shadow : 0---0---50---20---Color black. (same settings)
27.
Open the tube deco-1
Edit --- Copy
Activate your work --- Edit ---Paste as new layer
28.
Layers---New raster layer.
Flood fill the layer with the gradient
29.
Effects ---Plugins---Alien Skin Eye Candy 5: Impact---Gradient Glow---use the settings below
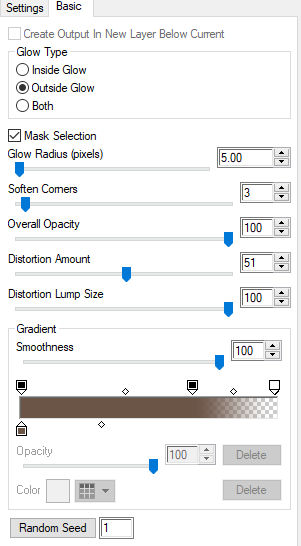
30.
Layers---Arrange ---Send to Bottom
31.
Effects---Plugins--- Filter in Unlimited 2.0---PentaCom---Jeans---using the default settings
32.
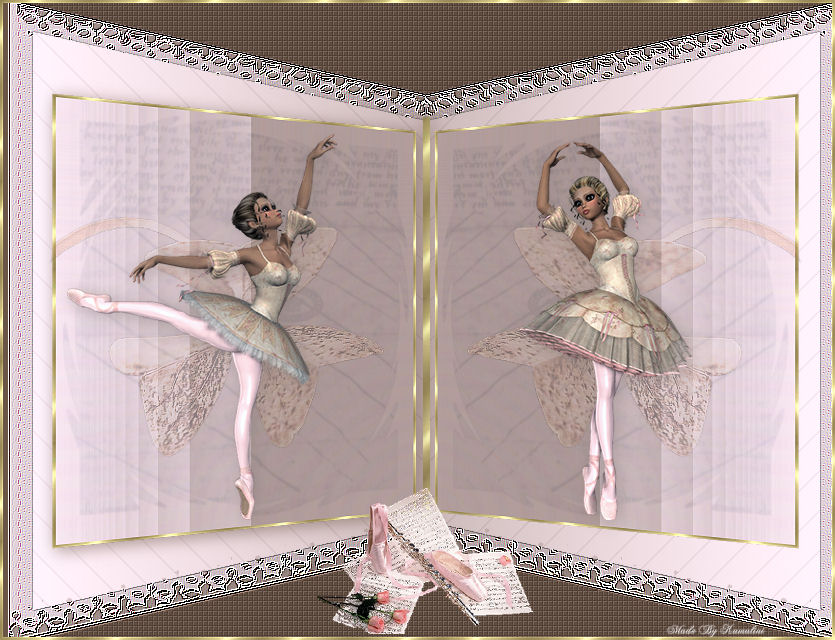
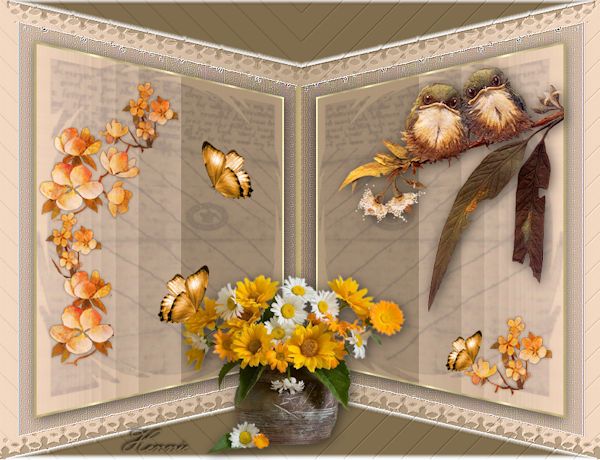
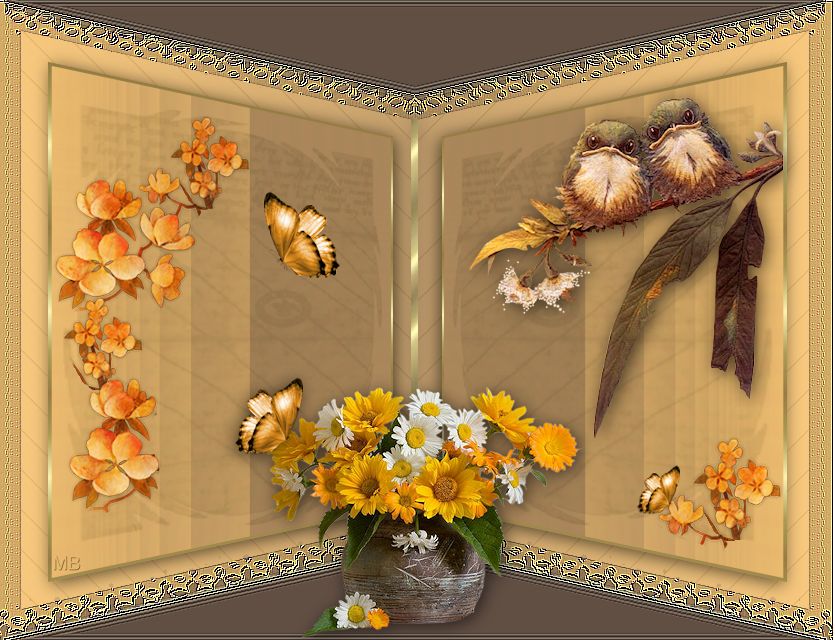
Arrange the tubes according to your own taste.
Drop shadow at your choice
Image---Add borders---2 pixels with the Dark color
Layers---New raster layer---Add your watermark
Save as JPG
Enjoy this lesson.
Mieke
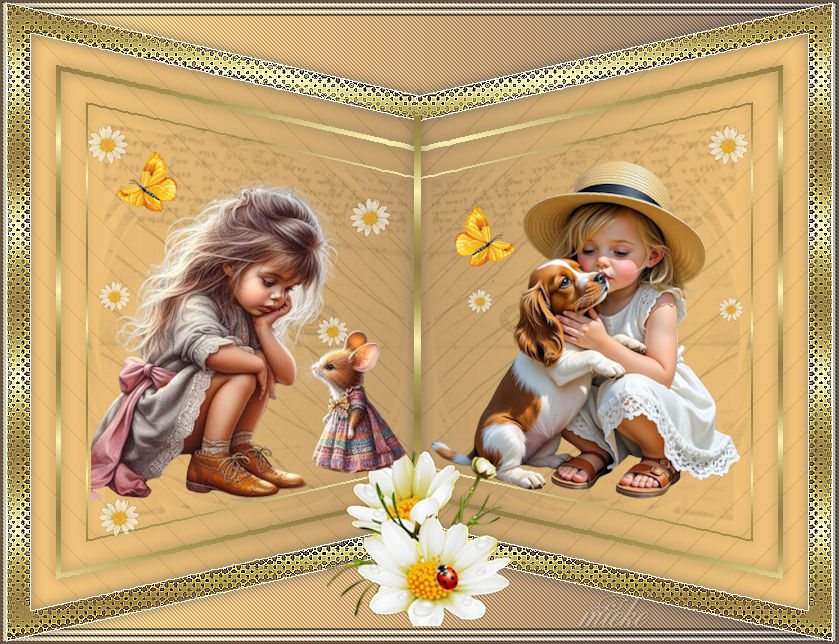
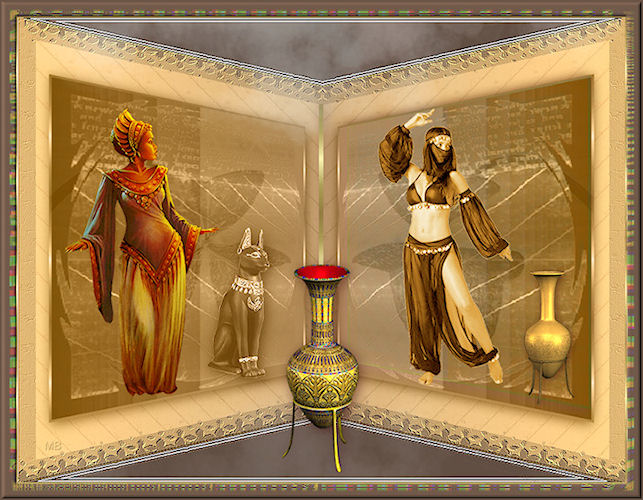
Example created by Kamalini


